A quilted jacket has been on my radar for a few years now, and it was finally time to commit to making one.
Originally, I was planning on a patchwork jacket with quarter circles, but when I laid it out on the pattern pieces, the scale was going to be all wrong. So I chose to keep it simple and do a whole cloth quilted jacket.
Pattern Used
There are quite a few quilted jacket patterns available, and so many different quilting designs – see my Pinterest board for inspiration.
My criteria for selecting a pattern were:
- Below butt length
- Collar
- Reversible
- Pockets – on both sides of the reversible jacket
After a lot of reading reviews and closely looking at the designs that made it possible to be reversible, I chose the Wildwood Jacket from Helen’s Closet with a collar from the Collar and Hood Expansion Pack in the low hip length.


Pattern Preparation
The expansion pack with the collar required the shoulder seam to be adjusted on the original front and back pieces. The PDF was edited in Inkscape before using a projector to project the pattern onto greaseproof paper for tracing.
The jacket is very loose-fitting, and I didn’t need to do my usual grading between sizes.
The only change was to adjust the pocket shape so they were more rectangular, as I liked the pockets used by Ginger Peach Studio in her duffle coat.

Fabric & Supplies
I definitely wanted to have a jacket with a plain side and a more bold print on the other side.
For the plain side, I chose a quilting fabric in marine blue with a navy leaves print. And, for the bold side, a floral with pink and aqua flowers and leaves on a navy background that really fits in with my wardrobe.
The Wildwood Jacket recommends using no-sew snaps, and those don’t look great on the underside, so I chose to use sew-on snaps that I could cover in fabric and that were not visible when the jacket is closed.
The complete list of supplies for my quilted jacket was:
- 2m of Floral Secret Garden Quilt Backing from Hobby Sew
- 2m of Navy Sprig Quilt Backing from Spotlight
- 1m of Navy Prima Homespun for binding from Spotlight
- 2m of Legacy 60/40 Cotton/Polyester Wadding with Scrim from Spotlight
- 5x 15mm Silver Snaps from Spotlight
Cutting Out & Quilting
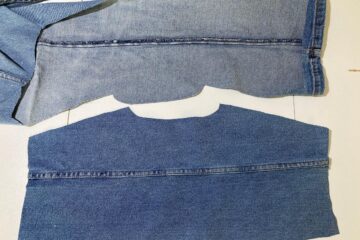
All pattern pieces had to be quilted first, and the pattern suggested cutting them out 2cm larger to allow for any shrinkage in the quilting process.
I cut out each piece about 5cm larger, only because I had quite a bit of fabric. The floral was cut out first, then the plain marine blue/navy and finally the batting. These were then sandwiched together.
For the quilting, I used squares on a 45-degree angle. And used the following sizes:
- 5cm for all pattern pieces except the collar
- 2.5cm for the collar
To mark the squares, I used the Clover White Marking Pen. It was the first time using the pen, and it does take a bit of patience as it takes a few seconds after drawing the line for the white ink to show. The disappointment came when the pen ran dry before finishing the jacket, and I reverted to my trusty Clover Chalk pencil.
So I’ll continue my search for a white marking pen that doesn’t run dry so fast. If you have any suggestions, contact me.
To keep the layers together while quilting, I used one pin in each square, and if you look at the photo below closely, you’ll see the pin direction I used.
To quilt, I start in the middle of each pattern piece. The squares on the left side of the sleeve have the pin head on the left, and the squares on the right have the pin head on the right. That way, when quilting down the centre, the pins can be pulled out with my right hand as I sew.
Then I’d move to the next row on the right and so on. After getting to the outer edge of each piece, I’d flip it around 180 degrees and sew down each line in the opposite direction, now with the pins on the right and easy to remove.

For the quilting, I used a walking foot so all the layers stayed together, a quilting #80 needle, a straight stitch plate and a longer stitch length of 3.0.
Once the quilting was completed, the pattern piece was placed on top and cut out. A basting stitch was sewn around each cut out piece to hold the edges and the quilting threads in place.

The collar with 2.5cm squares quilted instead of the 5cm squares used elsewhere.

Sewing Welt & Patch Pockets
For the pockets, I used my own method of constructing welt pockets on the bold floral side and patch pockets on the plain side. I was inspired by the jacket that The Lilac Elk made, which used horizontal pockets on both sides of a quilted jacket.
My own interpretation was to use pockets with the opening on the diagonal, as I’d made in previous Kelly Anorak’s by Closet Core.
The first step was to create the welt pockets by thread tracing their location.

Then, creating the welt opening, the welt and finally the pocket. All of which I didn’t photograph 🙁
I marked with pins where the patch pocket was going to be placed, as seen below, so the welt pocket had to fit within these boundaries.
The raw edges of the welt pocket were turned under and handstitched in place.

Sewing Patch Pockets
The patch pockets were made a little differently from the rest of the jacket.
The diagonal sides of just the two fabric pieces were sewn together before quilting. This meant I didn’t have to bind this edge, resulting in a quicker and cleaner finish.
Once sewn, they were turned to the right side, pressed flat and the batting inserted between. Quilting and cutting out the pocket pieces could then be done.

The raw edges on the pocket were bound with 4cm wide bias and pressed to the wrong side.
The excess binding on the back of the pocket was trimmed so that when both sides of the binding, the outer and inner sides, were sewn, the raw edges would be between those two rows of stitching.
This tip came from Grainline Studios, Tamarack Jacket Sew-Along Day 9 video.

The pockets were pinned carefully over the back side of the welt pockets and sewn onto the plain side of the jacket. You’ll see each pocket has two lines of stitching on the binding.

And this is how the welt pocket looks on the floral side. The stitching from the patch pocket is visible, and I like how it looks.

Sewing the Seams
To make the jacket reversible, I used faux flat felled seams on the marine blue/navy side of the jacket. Strips of the same fabric were cut 4cm wide and sewn at the same time as the seams were sewn.
The seam allowance was trimmed by about half, and the bias wrapped around the allowance and handstitched down.
Having the same fabric for the bias makes the seams blend in nicely.

Sewing the Jacket Collar
The collar was attached to the jacket with a faux flat felled seam too, with a 4cm wide bias strip.
Due to the thickness of the jacket body and the collar, clips were used for the first seam instead of pins.

Once the seam was sewn and seam allowance trimmed, the binding was tucked under, pinned and hand sewn in place.


Binding the Jacket
There was a lot of binding to sew for this quilted jacket. If you need practice in binding, this is the perfect pattern.
Binding is used to finish the raw edges of the front, back, collar and sleeve hems. I made my own binding from 5cm strips of navy prima homespun cut on the bias.
The folds of the binding were pressed to the centre with a 25mm Clover Bias Tape Maker, and an iron. And then folded in half again lengthways to create 12mm wide double fold binding.
To sew on the binding, it was opened out and stitched along the first fold line at the 6mm mark, stretching slightly around curves.
The binding was then folded around the raw edge and pinned in place.
I did think about hand stitching the binding in place, but that would have taken an extremely long time, so choose to use the sewing machine to sew it down one millimetre or so from the folded edge of the binding.


Sewing the Jacket Sleeves
The sleeves used faux flat felled seams for the sleeve seam and the armhole. Navy binding was used for the raw edge of the sleeve hem.

Adding Snaps
The sew-on snaps were covered in fabric to match the side of the jacket they were sewn to.
For the floral side, I fussy cut the print so it would match the print on the jacket, where the snaps were attached, so it would blend nicely.
The fabric was cut about 5mm larger than the snap, and a running stitch sewn around the entire edge of the the fabric. The snap was then placed on the wrong side of the fabric and the running stitch tightened to enclose the snap. A few stitches were made across the back of the snap to hold the fabric in place.
A hole was made with an awl in the centre of each snap so that they could properly snap together. Fray check was applied to each to prevent further fraying.
It will be interesting to see how the fabric on the snaps holds up over time. I’ve never used this method before.

Quilted Jacket Review
I’m so happy with how the jacket has turned out. I’ve worn it quite a few times, and it’s just like wearing a quilt, so snuggly.
As much as I thought I’d usually wear the plain side facing out, I actually prefer the bold floral. Especially on a grey and dreary winter’s day.
The only change I’d make next time is to make the pockets a little larger. For my hands to fit in the pockets, I need to make a fist, and I’d prefer to have my hands outstretched for those times I need to warm up my hands.
It’s a jacket that I’ll definitely be making again.


0 Comments