During the school holidays, my son asked me to make a Toothless Dragon from the movie “How to Train Your Dragon”. This isn’t the first time I’ve created Toothless. I created a Toothless Dragon Softie in 2022 with a pattern by Munch for Lunch that I found on Etsy, which is unfortunately no longer available.
At the time, we saw a much larger dragon pattern, but I said a definite “No, it’s too large!”
So three years later, he’s asking again for the Giant Toothless Dragon, so it’s time to give it a go.
Pattern Used

This is a digital pattern by Llaano on Etsy called Giant Toothless plush.
The final measurements of the dragon is:
- Wing span: 228cm (90″)
- Head to tail: 127cm (50″)
Pattern Preparation
I wanted to print it onto A0 paper at Officeworks, but when I tried to upload the file, it wasn’t accepted as it wasn’t the exact dimensions of A0. The only option was to print the pattern on A4 sheets of paper and taping them together.
There was a lot of printing and taping.
For the larger pieces, like the wing, I taped them to my large bedroom window to make sure all the pages lined up.

If I had to do it again (and now I’m happy to use a projector for sewing patterns), I would project the pattern onto paper and trace off the pattern, as that’s included in the pattern download.
My son and I traced off all the pattern pieces onto greaseproof paper, as it’s so much easier to work with than printer paper.
Interestingly, the pattern had three different seam allowances available to use on each pattern piece, which I’ve never come across. There was 6mm (1/4″), 12mm (1/2″) or 19mm (3/4″). I chose 12mm (1/2″) as this was not too little and not too much – the goldilocks of seam allowances.
Fabric & Supplies
As I did with my first Toothless plushie, I used black minky polar fleece from Spotlight. The pattern said 5 metres, but didn’t give any fabric widths. As this particular fabric was 147cm wide, I ended up with 1 metre left over. So if you’re using 147cm wide fabric, go with 4 metres.
The other items used were from Spotlight, unless specified otherwise:
- 2m of 1.5m wide 150GSM Polyester Wadding for the wings
- 500g Stuffing Poly Pellets for the feet to add as a weight
- Birch Fusible Medium Woven Interfacing
- 3 x 2 packs of polyester pillows from Big W <<< Big cost saver to regular stuffing
- 8mm Rare Earth Magnets from Bunnings for the back fins, so they open and close
- 12mm Rare Earth Magnets from Temu
- 20mm Rare Earth Magnets from Temu
Cutting Out

My son also helped cut out the many, many pieces – 26 in total.
For the more shapely ones with spines, I didn’t cut out each spine as I knew I would need to use the paper pattern piece anyway while sewing, as you’ll see further down.
Once each pattern piece was cut out, I used a wonder clip to keep the fabric and pattern piece together.
Embroidered Eyes
I knew from the outset I wanted to uplevel my eye construction. Previously, I used felt in a few colours, and it looked fine, but it did pill after a while, and I knew it could be better.
There was a machine embroidery file I could buy from Llaano to do the eyes just for the toothless dragon. At an Australian Sewing Guild meeting, I asked if anyone knew where I could have them stitched. Fellow member Jenni very kindly offered to do them for me – she didn’t leave home without the fabric, so she couldn’t get out of it!

Jenni did a fabulous job, and I knew it would make this dragon a standout.

If you don’t have an embroidery machine, I’d highly recommend asking your sewing friends or even paying someone to do them for you. It really is worth it.
Magnetic Fins
In the movie, the back fins along the dragon’s spine open and close. The pattern mimics this by placing two back fins side by side, with magnets on either edge.
Because the fins have spine-like shapes in varying sizes, I used three different sizes of round magnets — 8 mm, 12 mm, and 20 mm — depending on the fin. I wanted a snug, secure fit.
The pattern suggested placing or gluing the magnets in place, but I didn’t like that idea. A bit of Googling led me to a You Sew Girl blog post showing how to sandwich magnets using woven interfacing, and that’s exactly what I did.

I marked the positive side of all magnets in blue chalk, ensuring that one side of the spine would have blue chalk facing up andthe other side facing down, so they would snap together correctly.
I initially tried using the sewing machine to stitch around each magnet, but it didn’t work. In the end, I hand-sewed around all 42 magnets to ensure they wouldn’t move, and then attached each one to its individual fin.

Weighted Feet
All four feet were given some extra weight with poly pellets. I bought a 500-gram pouch and divided it evenly, so each foot held 125 grams. To keep them contained, I made small bags from navy cotton fabric to hold the pellets.
- Cut fabric 20cm (8″) x 25cm (10″)
- Fold fabric in half so it measures 20cm (8″) x 12.5cm (5″)
- Sew two sides, a short side and a long side.
- Turn to the right side.
- Fill with pellets (don’t include the clip as you see below)
- Fold the raw edge under and sew twice.
These were inserted into the feet just before the legs and body were stuffed.

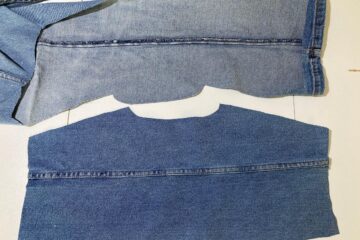
Sewing Giant Toothless Dragon
Here are some images from the sewing process as I worked my way through the pattern instructions.


Giant Toothless Dragon Review
The Giant Toothless Dragon turned out even better than I expected, and the machine-embroidered eyes really bring it to life.
My son loves his Toothless dragon and regularly moves it with him from his bed to the couch. Knowing that he helped with the preparation makes it even more special – I just hope he doesn’t ask for anything bigger.
It measures 90” or 228cm across the wings and 50” or 127cm from head to tail. Sewn over a three-month period, my guess is that it took about 70 hours to make.


0 Comments